Ready to Get Your Dubsado Set Up? Start With These 8, Easy Things
March 20, 2024
You’ve just started your Dubsado free trial (or committed to the annual/monthly plan) and you’re ready to get your Dubsado set up and started, but where the hell should you begin?
I’m so glad you asked.
Because while it might be tempting to jump straight to the shiny stuff (like creating proposals, questionnaires, and other beautiful forms), the very first thing you want to do to get your Dubsado set up is edit your brand settings.
It’s ridiculously easy. And I’m going to walk you through exactly how to do it in this blog post.
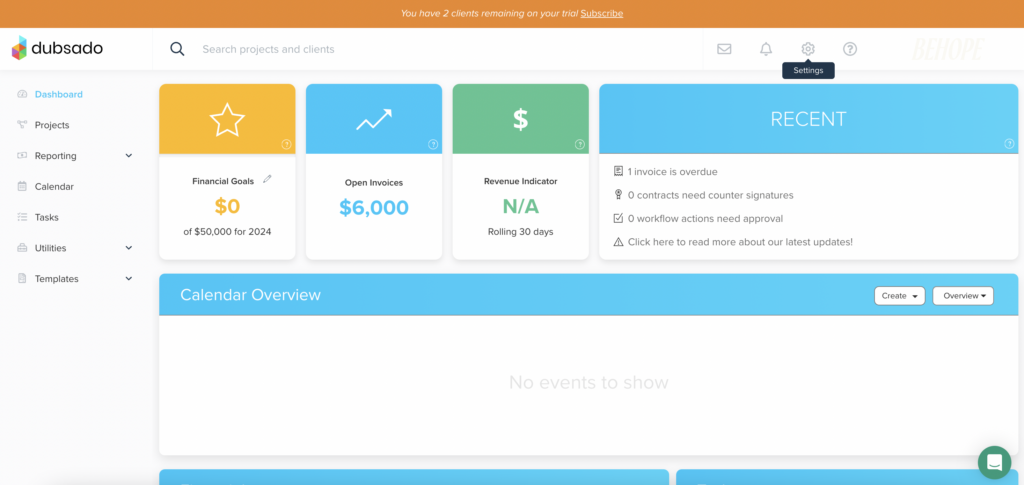
P.S. To get to the Brand Settings in Your Dubsado, click on settings icon
Dubsado Set Up Step #1: Edit your brand settings
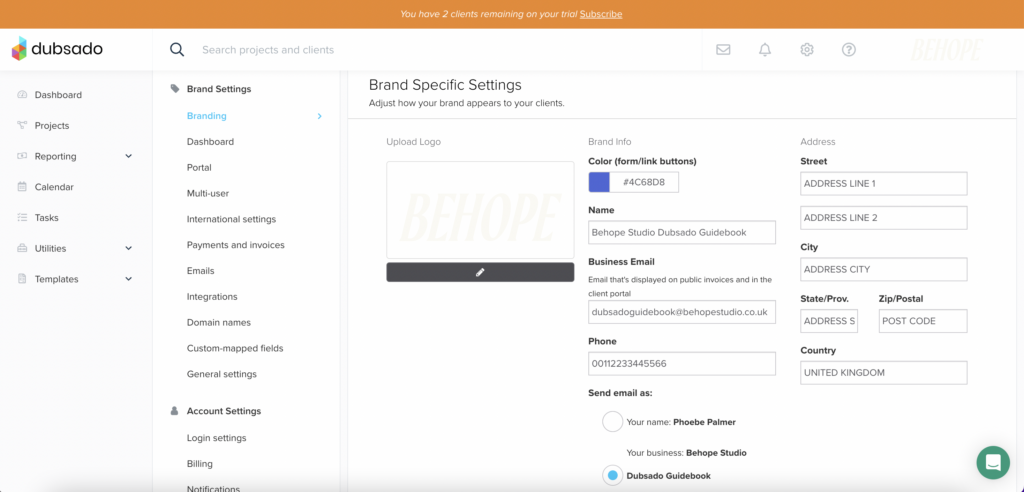
There are three things you absolutely want to do in this section:
- Upload your logo file because your logo will show up in your client portal and on all of your invoices
- Copy and paste the HEX code of one of your primary brand colours so that an on-brand colour will pop up on all of your buttons and forms
- Type your business name in (NOT your personal name!)
- Enter your business email and phone number (both of these will show up on client invoices)
- Select whether or not you want the emails you send from Dubsado to use your name or your business name
- Lastly, put in your official business address which will also appears on all of your invoices
Dubsado Set Up Step #2: Customize your client portal

Your Dubsado Client Portal is a magical place because it houses all the forms you want your clients to be able to view and access. (Like contracts, invoices, questionnaires, proposals, and more).
And if you’re planning on using the client portal with your clients (which I highly suggest you do since it’s already built into Dubsado), you’ll want to customize all of the following elements:
- Portal Welcome Message: Customize this message to say something more specific like “Welcome to your [insert your brand name] client portal”
- (Optional) Portal Project Label Override: if you’d like, you can change the “Projects” title tab to be something more related to your offerings (for example: “Wedding”). However, this will show up in ALL client portals. So, if you do change it, be mindful to title it something that will make sense with all of your clients.
- (Optional) Portal-Specific Logo: if you’d like, you can upload a portal-specific logo. However, you certainly don’t need to because it will automatically show the logo you uploaded in your brand settings section.
- (Optional) Portal Banner: if you’d prefer for the banner on your Dubsado client portal to be an image rather than a block of colour, you can upload an image here!
- (Optional) Portal Mobile Device Banner: again, if you’d prefer for the banner on your Dubsado client portal to be an image instead of a block of colour when clients open the portal on their mobile, you can upload an image.
- Portal Banner Color: unless you choose to upload images as the background for your Dubsado client portal banner, I would absolutely recommend entering the HEX code for the colour you want to be across the top of your client portal.
- Portal Banner Font Color: copy and paste the HEX code of the colour you want your text to show up as. (This colour will show up for the welcome message text and the logout text!)
- Portal Summary Header Color: if you’d like the header colour behind the boxes labeled “Business Info,” “Unread Emails,” “Incomplete Forms,” and “Open Invoices” to be a beautiful on-brand colour, upload the HEX code here.
- Portal Summary Header Font Color: to change the colour of the font at the top of those four boxes (“Business Info,” “Unread Emails,” “Incomplete Forms,” and “Open Invoices”), copy and paste the HEX code!
Dubsado Set Up Step #3: Set your time zone and currency
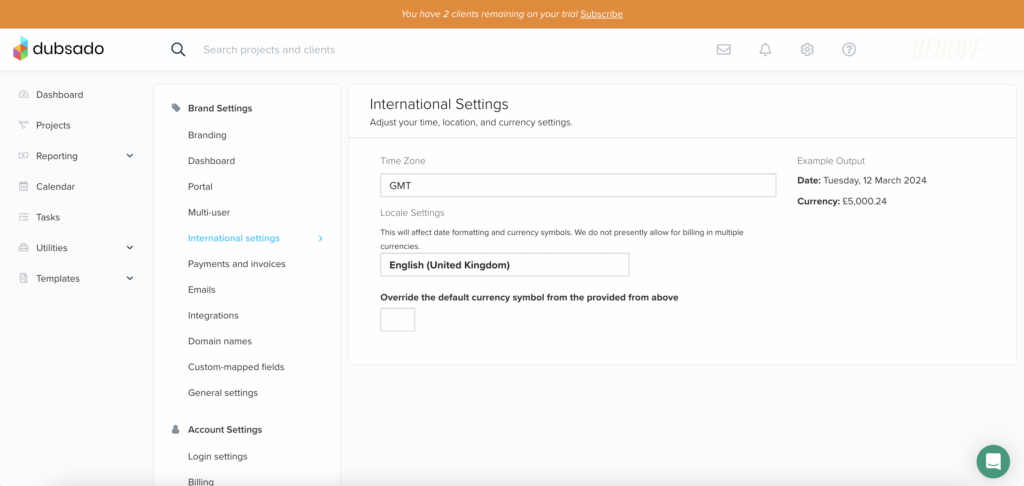
This one is ridiculously straightforward. All you have to do in this section is enter your time zone and your currency settings. You’ll see an example pop up on the right so double-check that to make sure everything looks correct.
Dubsado Set Up Step #4: Connect your money
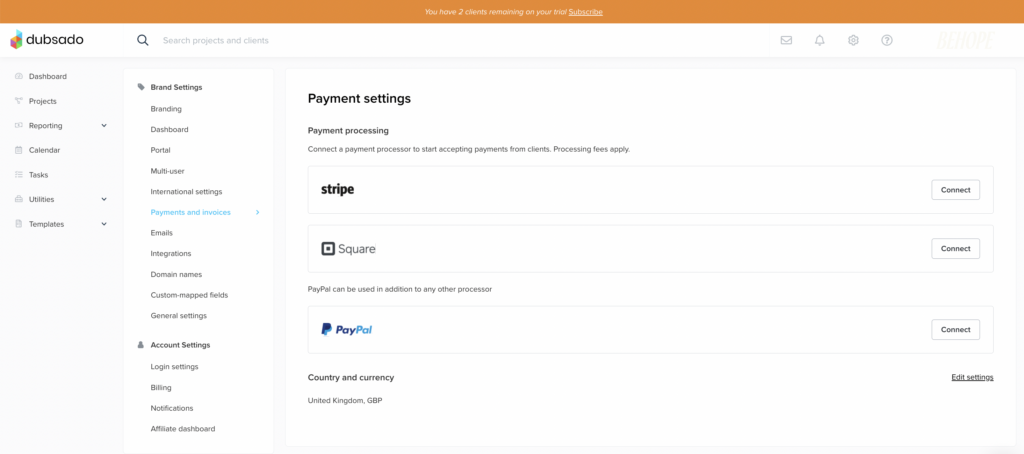
If you have a payment processor you use to accept payments from clients, you’ll connect it here! Choose Stripe, Square, or PayPal. You can connect two as long as one of the payment processor options is PayPal, but you won’t be able to connect Stripe AND Square.
All you have to do is hit connect!
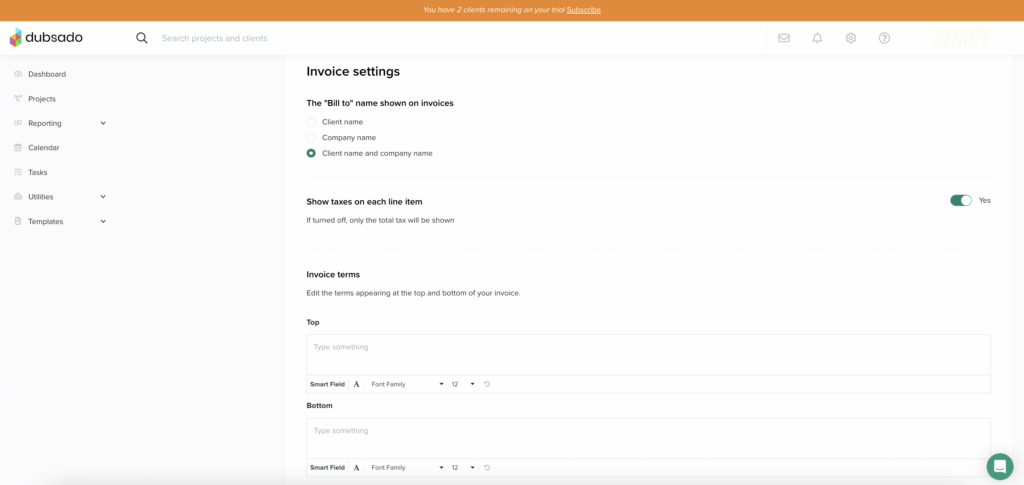
If you don’t have a payment processor, you can still edit the “Invoice” settings at the bottom of this tab by writing in your bank details into the box labeled “Top”.
Dubsado Set Up Step #5: Connect your email
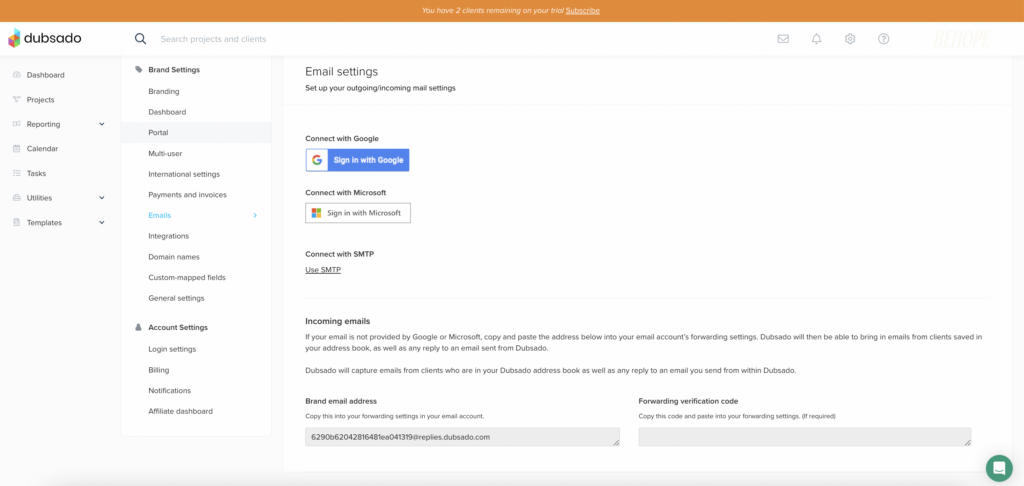
To connect your Dubsado account to Google or Microsoft for email, it’s ridiculously simple. Literally all you have to do is hit the “sign in” button.
But… if you don’t use Google or Microsoft, you’d hit “Use SMTP” (which stands for The Simple Mail Transfer Protocol). You’d select your email provider and then enter your username and password. You’d also want to set up forwarding emails (the section at the button) by copying the brand email address Dubsado provides and pasting that email into your email account’s forwarding settings.
Dubsado Set Up Step #6: Connect your conferencing (which will naturally connect your calendar)
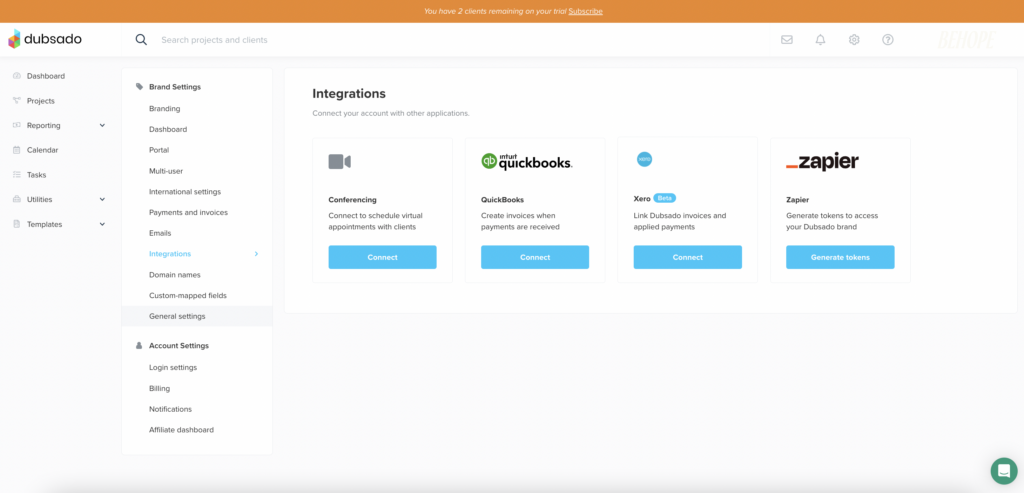
This absolutely essential step you’ll want to do to get your Dubsado set up and ready to use is to connect Dubsado to your video conferencing platform.
To do so, go back to “Brand Settings,” click on “Integrations” and then click “Connect” under “Conferencing.”
Dubsado Set Up Step #7: Connect your calendar correctly
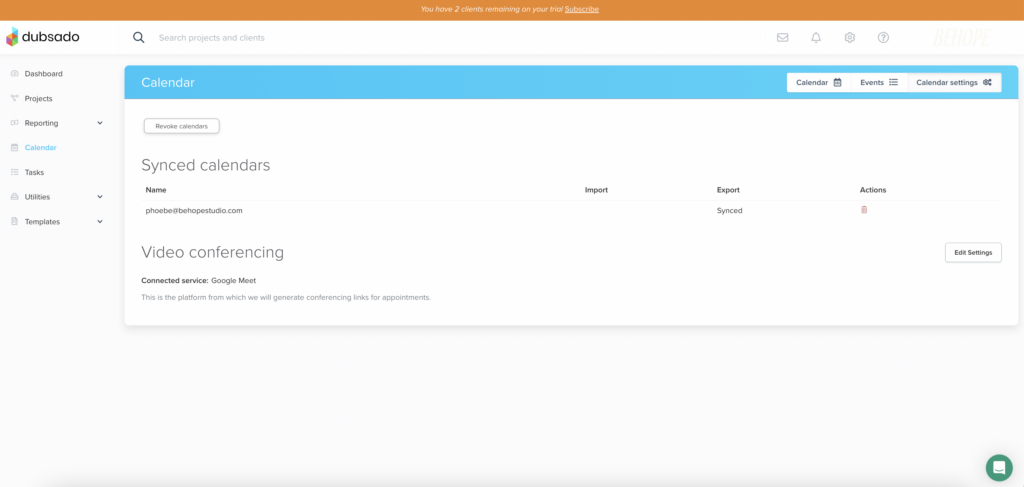
Another ridiculously easy thing to check off your Dubsado setup to-do list is to connect your calendar. All you have to do is hit “sync calendar” and then select the calendar that is right for you.
Follow the steps to sign in. Go back to calendar settings in Dubsado and under “Available Calendars” hit “Link Calendar.”
The next thing that will pop up is the sync calendar options. (I would suggest selecting both import and export so that the same events show up on both your Dubsado calendar and the calendar you connected to.)
And now that you’ve got the basic brand settings in Dubsado set up, you’re ready to move on to what’s next! (Like connecting your accounting platforms, customizing your URL, creating your packages and payment plans, designing your forms, and more.)
But if you’re feeling overwhelmed about having a go at the rest of everything on your own…
Check out The Ultimate Dubsado Guidebook
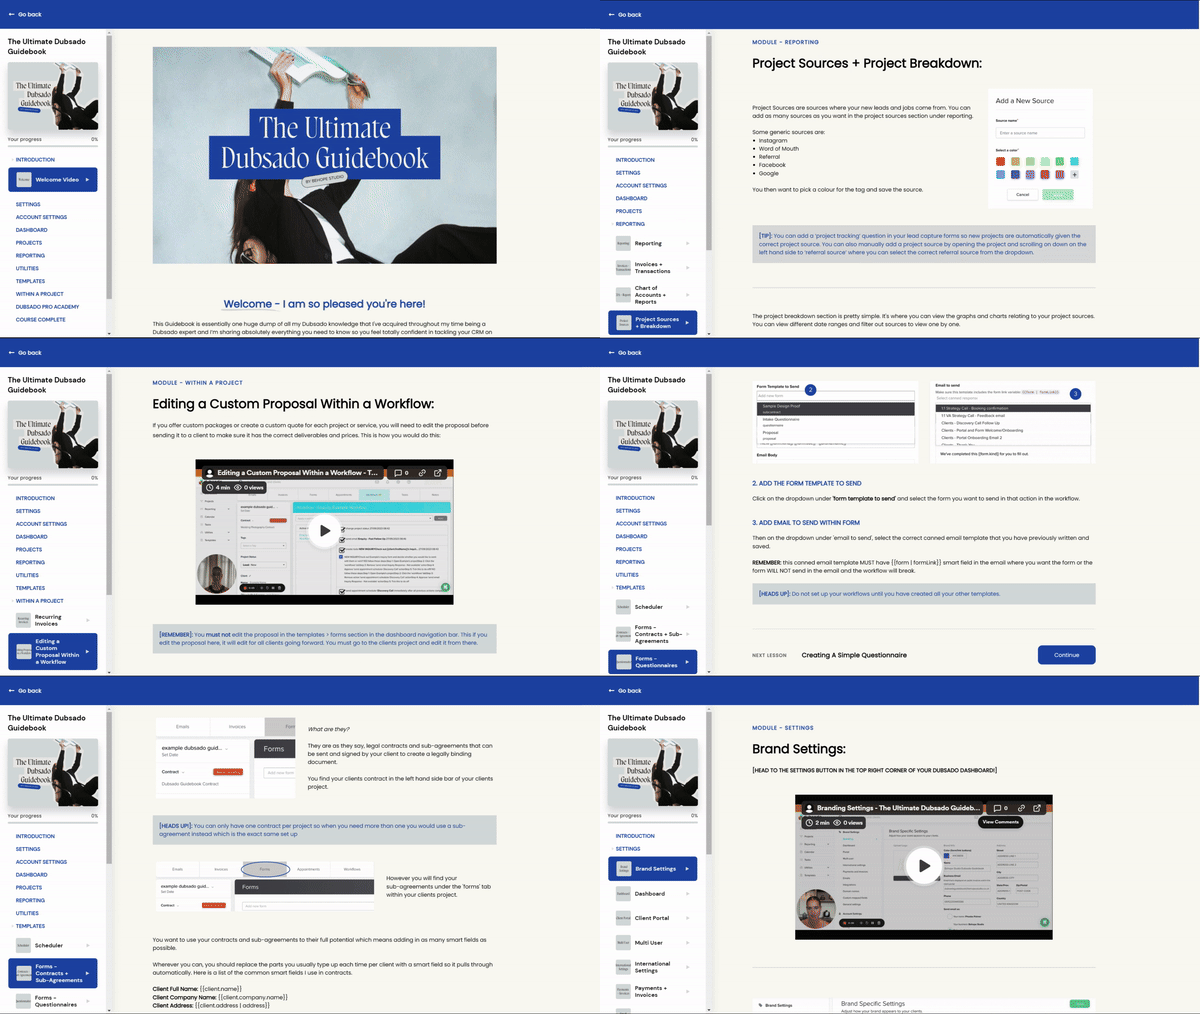
It gives you the practical step-by-step lessons you need (through video tutorials and with written instructions) so you can get your entire Dubsado set up and running, without having to worry over whether or not you’re doing things right.